


I could search the four corners of the Earth and never find a lead. Under the bed, tucked down behind the cushion on the sofa, digging deep in my pockets: nothing. I could cold call and cold email until my fingers bleed and my voice is gone, and still get nothing. Or I could put a lead generation form on my website, stick the kettle on, and wait for the leads to come to me...
I know which one I’d prefer.
Here comes absolutely everything you need to know about a bastion of inbound marketing - the web form. What is a web form? Why are web forms effective? How to use marketing web forms. How to optimise web forms. And loads and loads of lovely web form templates.
Let’s get growing.
What is a lead generation form?
A lead generation form is a web form. A web form is an area of your website where visitors can fill out their own information, send it off to you, and usually get something in return. There are loads of different purposes for webforms that you can put on your website: the free trial webform, the event registration webform, the gated content webform, all your ad campaign landing page webforms, feedback webforms, and just about any other webform you could dream of.
Let’s say… you’re launching a new feature in your CRM system. It’s called Workflows, and it automates annoying, daily processes. You’re hosting a webinar with your gorgeous Customer Success Team to tell excited leads all about your new feature. You’d create a landing page, like this, with a webform for visitors to fill in to receive their email invite to the event. Like this.
Scroll to the last section of the article, if you want to see free form examples of different webforms.
Why are lead generation forms useful?
Let the customers come to you. Lead generation forms are useful because they only really give you the best quality leads. Website visitors who are willing enough to give up their information, for whatever you’ve got in return, probably dig your stuff. Inbound sales prioritize individual buyers, their needs, challenges, pain points, and goals. It’s a buyer-centric approach to marketing.
- Inbound marketing brings leads to you, generating (on average) three times more leads per unit spent than traditional methods. [Content Marketing Institute]
- Inbound marketing is easy on your budget. Businesses that mainly rely on inbound marketing save more than $14 for every newly acquired customer [HubSpot]
- Inbound marketing has a proven ROI. 4/10 brands that use marketing automation software see ROI improve within six months, while 75% see ROI after just one year. [Groove Digital Marketing]
Web forms are cheap, easy to implement, and have a superb ROI, if you get enough people filling them out. As with any kind of inbound lead generation strategy, they are rather passive. As a small business, we recommend not giving up on the cold calling and cold emailing just yet. It’s better to use a two-pronged attack of outbound and inbound marketing strategies to get the best results.
How to generate leads with a web form.
There are a few different web form builders out there. If you’re using a Google Sheets CRM, we showed you how to attach a web form to it a few months back. Alternatively if you’re looking for a start in web forming, give NetHunt CRM a go. There’s a two week free trial waiting for all our new users, and you’ll get to take our Workflows feature for a spin. It takes the hard work out of working hard and it automates web form creation and data capture.
When a lead provides their data, it goes straight into your CRM system. Then, you can create an automated set of actions to follow.
Hot to Capture Leads with Web Forms
Step 1. Start a new Workflow.
Head to your NetHunt dashboard/ Gmail inbox. Scroll down the left-hand side panel until you find the lightning bolt icon - that’s Workflows. Hit that, and then hit the new button in the upper-right corner of your screen. Give your Workflow a name.
Hint. Maybe the name should be something related to a webform.
Step 2. Add a starting trigger.
First, click add a starting trigger in front and centre of the page. From the “Start my Workflow when a…” popout menu, choose “Webform is submitted”.
Step 3. Create your webform.
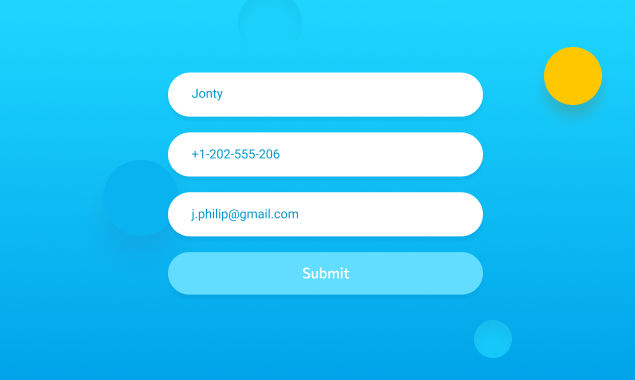
NetHunt’s web form creator should pop up, and it looks like this.
Here, you should give your form a title, a brief description, and then the fields you would like your visitors to fill out. Finally in this specific window, you can alter the text on your submit button. By default, it’ll be “Submit”, but maybe you’re running a competition and want it to say “Enter”; maybe you are running a webinar and want it to say “Reserve”.
By clicking on the different fields, you can edit them. You can choose a data input type from textual, numerical, email, and checkbox; decide whether they are required for submission; and you can delete them altogether if you need to.
Step 4. Alter your webform settings.
In the top right corner of the web form creation menu, you’ll find a settings cog. Hit that cog to open up a whole new world of web form settings. These settings include form template style, which is basically the colour scheme of your form; the title of the success page which submitters will be redirected to upon form submission; and the message they’ll see when they get to that promised land.
Hint. Dark is a personal favourite and very en vogue at the moment, but you can also choose from light (default), red, or blue forms. Colours matter so much that we decided to write an article about it.
After you’ve chosen your settings, simply hit the back button and then save it.
Step 5. Preview and share your web form.
After completing your webform, you can preview how it looks on your website by hitting save. If you feel like anything needs changing, hit the edit button on the top right-hand corner of the preview window. Once everything is tip-top and up to your usual high standards, you can finally share your web form to be filled out by loads of lovely leads. There are three webform-sharing options.
- Link. Share the link and your webform opens in a separate browser tab.
- Dialog box. A code that to insert under a button on your website. Once a lead clicks the button, the webform pops up in the same tab.
- Embed. Embed the form in your webpage, making it fully visible to leads straight away.
Step 6. Put the kettle on.
The beauty of inbound lead marketing is that once you’ve done the groundwork, the leads come to you. Still, a bit of A/B testing wouldn’t go amiss. Change the colour of your form, the way it is shared, different fields that need to be filled out, and figure out what works best.
Speaking of which, it’s probably best to know what the going standard is for your web forms...
Web form best practices.
- Keep it minimal.
Like a lot of things in life, less is more when it comes to web forms. We find that web forms with as few as three fields actually have the highest chance of conversion. It makes sense, when you put yourself in a website visitor’s shoes. They don’t want to fill out ‘the name of their first cat’ when they simply want access to a Sizzling-Hot eBook about Email Marketing; nor do you need to know that information.
Stick to the basics; keep it relevant. Only collect the information you need. A lead’s journey only begins at your web form, there'll be plenty more opportunities further down the line to collect data. - Reduce the need for typing.
Nobody wants to type an essay… ever. Web forms should be short and sharp, and should minimise the window for error to keep data sweet and clean. Substitute key strokes for buttons and sliders where you can. If you do require some typed responses, keep them as simple as possible. For example: “Which industry do you work in?” is better than “Give us a brief description of your industry and job role.” - Avoid duplicate fields.
A continuation of the theme in this section. Avoiding duplicate fields doesn’t necessarily mean make sure you don’t put the same field twice by mistakes. It means avoiding fields titled “re-type your email address” and other error-protection bits. You might think you’re clever, reducing the opportunity of mis-typed data by inserting duplicate fields, but you’re actually increasing your chances of a lead saying “gah, I can’t be bothered with this”. - Clearly distinguish required fields.
To be honest, you shouldn’t have that many non-required fields. But if you do, make sure the required fields are absolutely clear to avoid frustration. NetHunt’s web form builder marks required fields with an asterisk for you, after you toggle the switch when you create the web form. You can make extra sure by explaining this in the web form description text. - Be aware of “The Fold”.
The Fold is an old trend in print media. It’s the practice of positioning a headline or graphic perfectly in the top-half of a newspaper’s front page. It’s done so that the headline or graphic is perfectly visible when shops put them on display, usually folded over to save space. But what’s that got to do with a webform?
The fold on your website is anywhere that’s visible without a visitor having to scroll. There’s some leeway, because the position of your fold depends on the size of a user’s screen. Generally, your webform should be somewhere near the top. At NetHunt, we like to have the web forms description on the left-hand side of the screen and the web form parallel, on the right.
Often, the webform moves with the scroller.
Webforms: Free Lead Generation Templates.
Like I said, there are a million and one different reason to use web forms. Nevertheless, they all reach for the same goal: to generate leads. Here are a few NetHunt lead form samples to your ball rolling.
The Event Invitation.
In the post-Corona world, events such as webinars are big lead collectors. We run webinars for a bunch of different things, but we like them most when we’ve got a new feature to show off. The example below is, funnily enough, from our Workflows launch. It asks for data such as first name, last name, business email, company, job, and offers them a chance to ask a question in return for an invitation to the event.
The Ad Lander.
Create landing pages for all your ads. The people are hungry for information: give it to them. If they’re still hungry after reading a landing page, great! Stick a web form for maximum ad value; open up a conversation with your prospects and leads.
The ad lander web form should be short and sweet. Your potential lead has already consumed a fair bit of e-information to get to this point, their next stop should be to speak to a real person. This ad landing page web form simply asks for names, email addresses, and details for your preferred method of contact. In our case, it’s Skype.
The Gated Content Key.
Gated content is a transactional activity. You give out some smoking hot content in return for user data. Arguably, the most essential part of a gated content is the little checkbox at the end asking users to sign up for more content or information. My advice is to personalise this checkbox, offering a specific type of content similar to the one they are unlocking. Again, it’s simple: names, email addresses, and that magic checkbox.
There are loads of advantages to gated content...
- Qualified leads.
- An exclusive feel for content.
- Added business-value for content.
The Product Feedback.
A product feedback form is only ever a good thing. It’s a place for your customers to either vent their anger or share their love. Negative feedback is useful for devs, acting as a trigger for product updates or changes. Positive feedback… well we all like being told we’re good. Besides, positivity can also be the foundation of future content. After name, contact methods, and feedback comments, ask your customers if they would like to chat more about whatever they’ve got to say.
Web forms. Easy inbound lead generation, made easier by automated workflows.
Huzzah!


 product experts — let's find the best setup for your team